

Community garden landscaping turns a shared piece of land into an outdoor place that people can reach, use, and care for together. A successful plan is not just a collection of planting beds. It connects the site’s access, paths, drainage, growing zones, shared spaces, and maintenance routines so the garden works for many people over time.
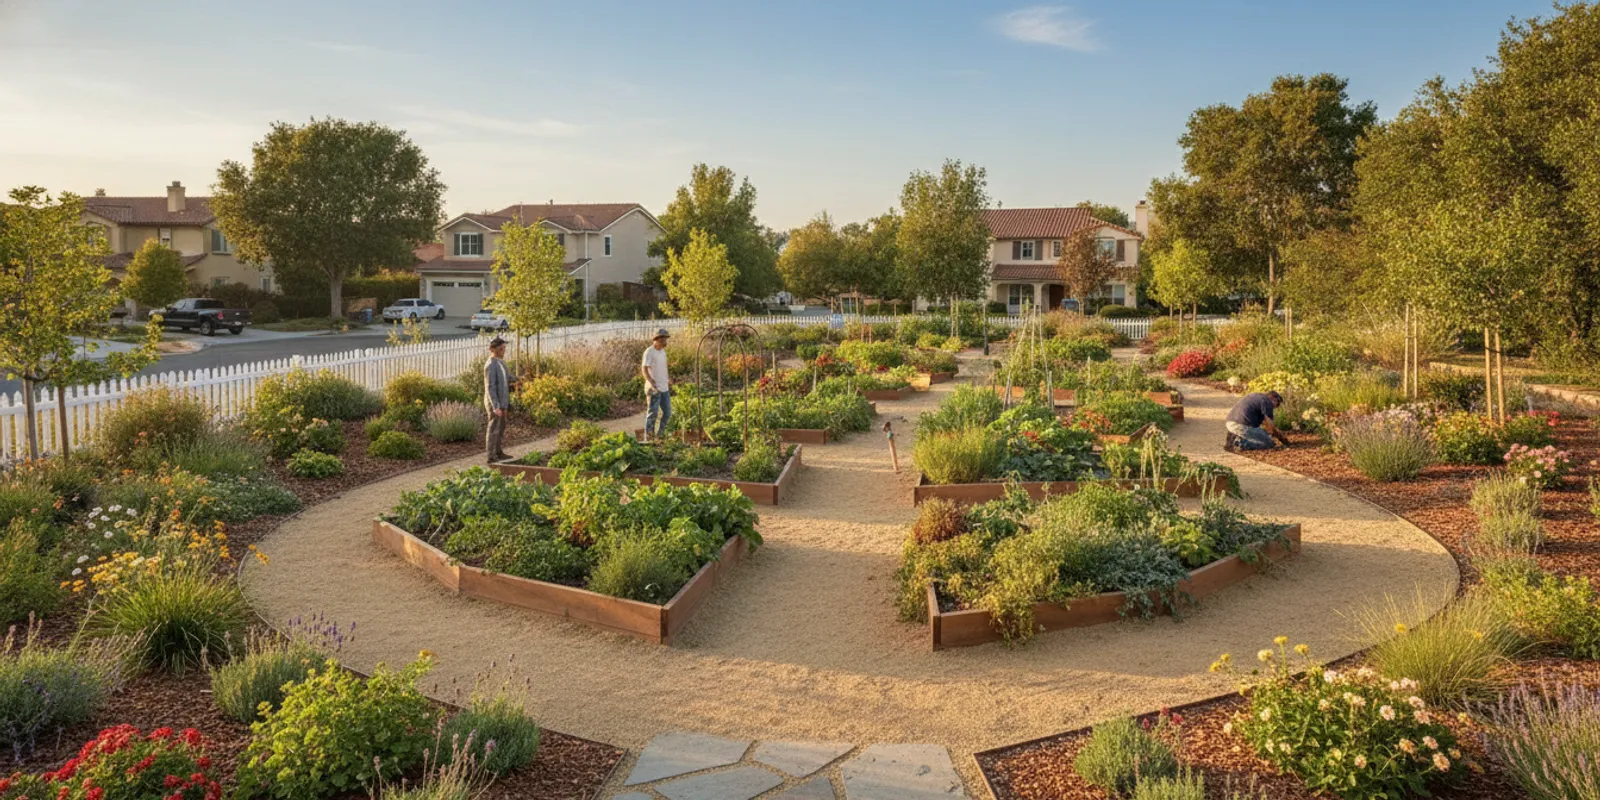
For California property owners considering a shared garden, the most useful first step is to understand how the land will be used. Who needs to move through it? What will people grow? Which areas will be maintained by individuals, and which will be shared? These decisions shape the layout before anyone selects plants or starts installation. This guide walks through practical choices for paths, beds, drainage, planting zones, and ongoing care. California Landscaping DP describes services that include landscaping design, installation, irrigation, planting, hardscaping, and maintenance; the final scope for any site should be discussed and confirmed for the project.
What makes community garden landscaping different?
A private garden can be arranged around one household’s routines. A community garden has to accommodate different schedules, abilities, preferences, and levels of gardening experience. People may arrive carrying tools, a watering can, or harvested produce. Some may tend a particular bed, while others share responsibility for paths, common planting, or water access. The design should make those different activities understandable without relying on every gardener to know an unwritten set of rules.
That begins with a clear physical layout. A visitor should be able to tell where to enter, where the main route goes, which spaces are for growing, and how to reach common features. A gardener should be able to work at a bed without blocking the way for someone else. A group should be able to identify which areas need routine attention and which are intentionally left alone.
Community use also changes how the garden may evolve. A new group might begin with a modest number of beds and later add shared planting or gathering areas. The layout should account for likely future needs without leaving the site so loosely organized that current users struggle to navigate it. Planning should balance a workable first phase with a coherent overall design.
There is no single layout for every community garden. A compact courtyard, an open property, and a long narrow side yard create different opportunities and constraints. Sun exposure, existing trees, slopes, access points, soil conditions, nearby buildings, and the amount of maintenance the group can coordinate all affect the plan. A design that responds to the actual site is more useful than copying a layout from another garden.
Start by agreeing on how the garden will be used
Before drawing bed locations, gather the people who will use and care for the garden. The purpose of this conversation is not to settle every future disagreement. It is to make the main needs visible before they become difficult to change. A practical plan reflects the group’s day-to-day activities as well as its hopes for the space.
- List the likely activities. Consider planting, watering, harvesting, moving soil or tools, teaching, gathering, and routine upkeep. Include occasional activities such as preparing beds at the start of a growing period.
- Identify shared and individual areas. Decide whether beds will be assigned, tended by small groups, or managed collectively. Mark common areas separately from spaces where users expect to make their own planting choices.
- Describe who will use the site. Think about children, older adults, visitors, people carrying supplies, and anyone who may need a less obstructed route. Do not assume every gardener has the same mobility or experience.
- Note the busy moments. If several people may arrive at once, plan for them to pass, pause, and work without crowding a single entrance or narrow aisle.
- Clarify care responsibilities. Identify who is expected to look after paths, shared plantings, irrigation, and seasonal cleanup. A landscape feature without a clear maintenance owner can become a source of friction.
Turn the discussion into a brief written list of priorities. For example: keep the route from the entrance to the growing area easy to follow; allow people to reach each bed without walking through another person’s plot; and make shared tasks visible. A short list gives the design conversation a useful reference point when tradeoffs appear.
It can help to separate needs from preferences. “People need to carry watering tools from the entrance to the beds” is a functional need. “The main path should curve” is a design preference. Preferences matter, but first confirm that the basic functions are covered. If the site cannot accommodate every wish, the group can weigh options against agreed priorities rather than personal taste alone.
Read the site before placing beds
Walk the property at different times and note what is already there. Look at how people currently enter and cross the space. Observe where sunlight falls, where shade lasts, where water collects after rain, and which areas are affected by nearby trees or structures. Record existing surfaces, changes in level, gates, fences, utility features, and places where people naturally stop. The goal is to understand the site’s conditions, not to assume they can all be changed.
Make a simple site sketch with boundaries and fixed features. Add known access points and the approximate position of buildings, large trees, slopes, and existing hard surfaces. Then walk the routes that gardeners are likely to take. Do they approach from one entrance or several? Where would they carry tools? Is there a direct connection between the entrance, beds, and any shared work area? A plan that ignores these movements may look orderly on paper but feel awkward in use.
Observe the property after rainfall if that is possible. Note puddles, runoff paths, soil that stays wet, and areas that dry quickly. Water behavior can influence both bed placement and path design. Avoid treating a low spot as an obvious place for a new bed before understanding where water comes from and where it goes. Changes to grading or drainage may affect adjacent land, so have site-specific work evaluated by a qualified professional where appropriate.
Sun and shade patterns matter as well, but record them rather than relying on a general description such as “sunny yard.” A location can be bright in the morning and shaded later, or receive different light as the season changes. Make a rough observation at several points in the day and note nearby structures and tree canopies. Plant selection should follow the actual conditions and the goals for each bed.
Also consider the experience of arriving. Is the entrance easy to recognize? Can someone pause there without blocking the route? Are tools, water points, or shared work areas likely to create a bottleneck? These questions are easier to address while the layout is still flexible than after beds and paths have been installed.
Choose a layout that supports movement and shared use
Think of the garden as a network of routes, growing spaces, and shared destinations. The main path should connect the entrance with the areas people use most often. Smaller paths can branch to individual beds. Shared destinations might include a work surface, a common planting area, or a place to gather. The arrangement should make sense to a first-time visitor and remain practical when several people are gardening.
A useful planning exercise is to draw routes before drawing the beds. Use a line for the entrance-to-garden route, then add likely trips to each bed and common feature. Where do lines cross? Does a person working at one bed stand in the route to another? Would someone carrying supplies need to turn through a narrow corner? The routes reveal where circulation needs more room and where a bed may be better placed elsewhere.
Do not make every path equally important. A clear hierarchy makes the garden easier to understand. The primary route can be the most direct and recognizable; secondary routes can reach individual zones. If every path has the same appearance and prominence, visitors may be unsure which way to go, and the group may spend effort maintaining routes that see little use.
Shared access should be treated as part of the design, not an afterthought. Keep routes to common areas distinct from the boundaries of individual plots. Avoid layouts that require people to step over planting or cross someone else’s bed to reach a destination. If the space is limited, discuss the tradeoff openly and look for a plan that preserves a simple, direct route where it matters most.
For a small site, a compact arrangement may work better than trying to fit many different features. For a larger site, zones can help users understand where individual growing, shared planting, circulation, and gathering happen. The exact arrangement depends on the property and the group’s needs. The goal is not maximum bed count; it is a layout that people can use and maintain reliably.
Plan paths for access, comfort, and upkeep
Paths determine how people move through the garden and how much of the site remains available for growing. A path that is too narrow for the way people actually use it can become frustrating. A route that is unnecessarily broad may take space away from beds. Consider what needs to pass along each route: one person walking, two people passing, a cart, or a person carrying equipment. The expected use should guide the design discussion.
Pay attention to turning and passing points, not only the straight sections. A path can appear generous on a plan but become difficult where it narrows beside a bed, passes a gate, or bends around a fixed feature. If different users need to pass each other, allow for places where they can do so without stepping into planted areas. A clear route is particularly important when the garden is busy or when visitors do not know the site.
Path surface selection should reflect use, drainage, maintenance capacity, and the existing property. A stable surface may be easier to navigate than loose or uneven material, but the right solution depends on site conditions and how the route will be maintained. Consider whether the material is likely to shift, collect debris, become slippery, or need frequent refreshing. Do not choose a surface only for appearance; consider how it performs after ordinary weather and repeated foot traffic.
Define path edges clearly where that helps people distinguish circulation from growing space. A visible boundary can make it easier to keep soil and plants from spreading into the route. It also supports routine maintenance by showing where trimming, sweeping, or repairs are needed. Edge treatments should suit the garden and should not introduce trip hazards or block water movement.
Path decisions are closely connected to bed dimensions and placement. If gardeners cannot reach the middle of a bed comfortably from its edges, they may step onto the soil and compact it. If the path sits too close to vigorous planting, it may become overgrown. Sketch the path-and-bed relationship as a whole. The bed should be reachable, and the route should remain open when plants mature.
For decisions about exact clearances, accessible routes, surface specifications, or site requirements, confirm applicable needs with a qualified professional familiar with the property. This guide offers planning considerations, not technical or regulatory specifications. A site-specific review can help reconcile the garden’s intended users with its physical conditions.
Arrange beds so people can reach and care for them
Bed placement affects how comfortable and predictable the garden is to use. Lay out beds in relation to paths, sunlight, drainage, and the way gardeners will work. Keep edges reachable from a route wherever possible. If a bed is surrounded by other beds or an inaccessible border, the group may find it difficult to plant, weed, water, and harvest without stepping through growing areas.
There are several possible bed approaches. In-ground planting can make use of existing soil where conditions are appropriate. Raised beds create visible boundaries and can separate growing areas from surrounding ground, but they also introduce construction, filling, and maintenance considerations. Containers may suit a limited area or a particular planting purpose, though they need an appropriate location and care. None is automatically best for every shared garden.
Before selecting a bed type, consider the site’s soil and how the garden will be used. If the condition or suitability of existing soil is uncertain, seek appropriate evaluation before deciding how to grow in it. The design can then account for the chosen approach rather than assuming the same solution throughout the property. A qualified provider can discuss the physical installation options that fit the site and intended use.
Keep bed boundaries understandable. Straightforward shapes can make it easier to assign spaces, maintain edges, and explain the layout to new gardeners. Creative shapes may add visual interest, but they should not create difficult-to-reach corners or narrow leftover strips. If a bed has a shared purpose, mark it clearly in the group’s plan so users know how it differs from individually tended plots.
Leave enough room for plants to mature without spilling into paths or neighboring beds. At the planning stage, people often picture seedlings and small plants. The mature planting may be much wider or taller. Use plant selection appropriate to the available space and conditions. Allow room for routine access to water, soil, and irrigation components if those are part of the design.
Bed numbering or a simple site map can help with coordination, especially if plots are assigned or shared tasks rotate. Keep labels simple, legible, and consistent with the group’s communication approach. The map should show paths and shared areas as well as beds. It is a practical reference for new participants, maintenance planning, and conversations about changes.
Make drainage part of the early plan
Drainage influences how the garden feels and functions after rain or irrigation. Persistent puddles can interrupt paths, limit access to beds, and make routine care more difficult. At the same time, water should not simply be directed away without considering where it will go. Observe existing patterns, identify the areas that remain wet or dry, and include those observations in the layout before deciding where to place beds and paths.
Look beyond the exact spot where water collects. Notice whether runoff arrives from a slope, roof edge, neighboring surface, or another part of the property. Consider how paths and bed edges may influence the movement of water. A new raised border or hard surface can change where water travels. Design decisions should account for those interactions rather than treating every feature in isolation.
Drainage concerns can be complicated by slope, soil conditions, nearby structures, and property boundaries. Do not assume that adding soil, digging a channel, or redirecting water is a simple fix. Where the cause or suitable response is uncertain, have the condition assessed by a qualified professional. Any site-specific requirements should be verified rather than inferred from a general gardening guide.
Path materials and bed placement should work with the observed water patterns. A surface that stays wet may require a different approach from a dry, stable area. Avoid placing a key route through a recurring puddle if another practical alignment is available. If an area is intentionally used for planting that tolerates its conditions, choose plants with appropriate guidance and keep the route to that area clear.
After installation, observe how the garden responds during normal use. Note where water accumulates, whether paths remain usable, and whether irrigation creates wet areas outside the intended beds. Share observations with the people responsible for care. Early attention can help the group distinguish a recurring site condition from a temporary issue and decide whether professional advice is needed.
Create planting zones with clear purposes
Planting zones help a shared garden stay organized without forcing every bed to follow the same planting plan. A zone might be defined by light conditions, the kind of care it receives, or whether it is tended individually or as a group. The reason for each zone should be clear enough that a new gardener can understand it from the site map and a short explanation.
Start with the site conditions. Record which areas receive sun or shade at different times, where moisture tends to remain, and which parts of the property are exposed or sheltered. Then match plant choices to the conditions and the group’s goals. The garden may include areas for different kinds of planting, but those areas should fit the available light, soil, water, and maintenance capacity. Avoid selecting plants solely because they look appealing in a photo or are popular elsewhere.
Grouping plants with similar care needs can make coordination easier. If one zone has different watering or pruning needs from another, a clear boundary helps people understand that difference. This is especially useful when multiple participants take turns with maintenance. The planting plan can identify which tasks apply across the garden and which are specific to a bed or zone.
Choose plants with mature size in mind. A small plant at installation may later shade a neighboring bed, narrow a path, or require more frequent trimming than the group can manage. Consider height and spread as well as appearance. Keep sightlines and routes in mind, particularly around entrances, corners, and shared areas.
Shared planting can create a visual connection across separate plots, but it needs a clear owner. Decide who chooses the plants, who waters them, and who responds if they spread or fail to thrive. Where a planting serves a practical purpose such as marking an edge, select it in a way that does not obscure path boundaries or make access harder.
Use a planting plan as a coordination tool, not a rigid promise that every plant will remain in place indefinitely. Weather, growth, and group preferences may lead to changes. Record the intended role of each zone and keep notes about adjustments. That makes it easier to learn from the site over time and avoid repeating choices that did not suit its conditions.
Coordinate irrigation with the garden layout
Water access is part of the circulation plan. Consider where gardeners will connect to or use water, how they will reach beds, and whether a shared route will become crowded during watering. A hose or irrigation line can cross a path, interfere with access, or be damaged if its route is not considered. Coordinate water features with beds and paths before finalizing the layout.
Different parts of a garden may have different watering needs. Sun exposure, plant type, soil, container use, and seasonal conditions can all affect care. The planting plan and irrigation approach should therefore be considered together. A layout that treats the whole garden as one undifferentiated zone may not match how plants and users actually interact with it.
It is useful to make responsibilities explicit. Who checks that water is available? Who follows the agreed routine? Who notices a leak or a blocked line? Who can make changes to shared irrigation? A system can be well planned and still be difficult to manage if no one knows who is responsible for it. Write down the agreed process in language all participants can understand.
California Landscaping DP lists garden irrigation among its services. Property owners can review the company’s landscaping and outdoor services and discuss whether a project’s irrigation needs fit the available scope. Specific design, installation, and maintenance details should be confirmed for the property rather than assumed from a general service description.
Plan for seasonal observation. Check whether the garden is receiving water where it is needed and whether paths or other areas are getting wet unintentionally. Adjustments may be appropriate as plants mature or as the group changes its planting plan. Any changes should be coordinated so one gardener does not alter shared equipment without informing the people who depend on it.
Use hardscape thoughtfully in a shared garden
Hardscape features can clarify routes, create usable work areas, and help distinguish shared spaces from planting beds. Their role should be practical as well as visual. A paved or otherwise defined area may give people a place to pause, sort supplies, or work without standing in a planted bed. The location should support the garden’s circulation rather than compete with it.
Start by identifying the need a hardscape element will meet. Is it intended to make a frequently used route clearer? Provide a durable area near a shared activity? Protect a path from routine wear? If the purpose is not clear, the feature may take up space without improving how the garden works. Discuss who will use it and who will maintain it before including it in the plan.
Consider how a hard surface interacts with drainage, nearby planting, and the character of the site. A surface may change runoff patterns or reduce the area available for planting. Its edges may need to meet paths, beds, or existing surfaces cleanly. The design should account for those connections and for ordinary maintenance, not just the appearance of a newly completed space.
Keep the amount of hardscape proportionate to the garden’s purpose. A shared garden needs usable routes and work areas, but it also needs room for planting and movement. A plan can begin with the essential circulation network and add other features only where they support a real use. This staged approach can help the group focus on the improvements that matter most to daily access.
For details involving construction, surface suitability, or site-specific constraints, consult a qualified provider. California Landscaping DP offers hardscaping and related outdoor improvements as part of its documented service categories; project scope and suitability should be confirmed through a direct conversation about the property.
Design for maintenance the group can sustain
Maintenance is not a final phase to consider after the garden looks complete. It is a design condition. Beds, paths, planting, and irrigation all create recurring tasks. Before selecting a feature, ask what it will require and who will do the work. A modest, well-managed landscape can serve the group better than a complex design that depends on attention nobody has agreed to provide.
List recurring tasks by area. Paths may need sweeping, edge checks, or repairs. Beds may need planting, weeding, watering, and seasonal clearing. Shared planting may need pruning or replacement. Irrigation requires observation and coordination. The exact tasks depend on the materials, plant choices, local conditions, and how intensively the site is used, so build the list around the proposed design rather than assuming a universal schedule.
Assign each task a role, a backup, and a way to report a problem. The same person does not have to do everything. A simple rota, sign-up, or group check-in can show who is responsible at a given time. Make the process easy to update when someone’s availability changes. Clear handoffs are more dependable than informal assumptions that someone else will notice.
Plan for periods when participation drops. A holiday, a change in membership, or a busy season can leave shared tasks uncovered. Decide which maintenance is essential and what can wait. If a feature needs frequent specialized attention, confirm that the group has an appropriate plan before including it. Where a task requires professional skill, identify that need early and discuss available options.
Keep care instructions concise and visible. A map can show shared spaces and zones. A short task list can explain who waters common areas, how concerns are reported, and which areas should not be altered without agreement. Avoid relying on complicated instructions that new gardeners must discover by trial and error.
Maintenance needs can change as the garden matures. Plants grow, paths settle, and patterns of use become clearer. Review the landscape periodically with participants and update the plan. California Landscaping DP lists garden maintenance among its services; property owners can ask about the project’s needs and confirm what work, if any, is appropriate for the company to undertake.
Make shared boundaries and responsibilities understandable
Shared gardens work better when the physical layout supports the group’s agreements. Marking the difference between individual plots, common planting, paths, and work areas can prevent confusion. Boundaries do not need to feel restrictive. They simply help people know where their choices are personal and where changes affect everyone.
A bed map should show assigned areas and shared areas clearly. If people can choose what to plant within their plot, explain any shared guidelines in a separate, easy-to-find place. If a group makes decisions together, record how changes are approved. A landscape design cannot resolve every disagreement, but a legible plan gives participants a common reference for discussing one.
Consider how a new member will learn the layout. Could they identify the entrance, follow a path, locate their bed, and understand which areas are common? A brief orientation can explain the routine and point out the map. Physical cues such as path edges, repeated bed shapes, or simple markers can reinforce that explanation.
Plan transitions between garden zones with care. A common planting border may define the edge between beds and a route. A gathering area may sit near the entrance rather than in the middle of a growing zone. These transitions can help people understand how to use the space without adding unnecessary barriers.
Review the plan with people who will perform regular care, not only those who attend initial planning discussions. They may notice that a route is hard to keep clear, a shared area is difficult to reach, or an assigned task needs a better handoff. Include those observations before the design is finalized and again after the garden has been in use.
Balance future flexibility with a clear first phase
Some groups want to build the entire garden at once. Others need to begin with a smaller, manageable area. Either approach can work when the plan identifies a clear first phase and shows how later changes could connect to it. The garden should feel complete enough for current users while leaving room for reasonable growth if the group’s needs change.
Prioritize elements that make the initial garden usable: a clear entrance, practical routes, accessible beds for the intended users, a planting plan, and an agreed way to manage care. Additional features can follow if they serve a defined purpose. This does not mean every project must be minimal. It means the group should understand what is essential for daily use and what is an optional enhancement.
When planning in phases, avoid placing the first paths or beds where they would block likely future routes. Consider where utilities, water access, and shared activities might fit. Record the assumptions that inform the first phase so later participants understand why the layout was arranged as it was.
Flexibility should not mean leaving boundaries and responsibilities unclear. Even a small first phase benefits from a simple site map and an agreed maintenance routine. Those basic tools can be updated as the garden grows. If the group changes the layout, review how the change affects access, drainage, planting, and shared care before proceeding.
Consider entrances and the arrival experience
The entrance is the first point where a visitor learns how the garden is organized. If it is difficult to find or opens directly into a crowded work area, people may not know where to go next. Review the approach from the surrounding property and consider whether the route feels obvious to someone who has never visited. A simple, visible connection from the entrance to the primary path can make the garden easier to use without adding decorative features.
Think about what happens just inside the entrance. Gardeners may need to pause, close a gate, put down tools, or wait for another person to pass. If all of that happens in a narrow route, the entrance can become a bottleneck. Look for a place where people can orient themselves without blocking circulation. If there is a shared notice or map, position it where people can stop safely and read it without standing in a planted bed.
Consider the route from the property boundary to the garden as well as movement inside the growing area. A site may have a usable garden layout but a confusing approach from the place where visitors arrive. Identify changes in surface, turns, gates, and other transitions that could affect someone carrying supplies or visiting for the first time. Do not assume that a path is clear simply because regular users already know it.
Use a walk-through to test the proposed entrance. Ask one person who has not helped with the plan to follow the route using only the cues that will actually be present. Notice where they hesitate, take a wrong turn, or need to step aside. This simple review can reveal whether the site map, path alignment, and visible edges work together. Adjust the plan before installation where practical, then explain any remaining constraints to users.
An entrance also affects the garden’s relationship with the surrounding property. Avoid locating shared activity where it interferes with other regular uses. Consider whether deliveries or routine maintenance could reach the garden without crossing sensitive planting. The right arrangement depends on the property and its users, so include the people responsible for the wider site in the discussion.
Think through tools, supplies, and work areas
Gardeners do more than plant and harvest. They may carry hand tools, watering equipment, soil amendments, containers, and harvested materials. The route between the entrance, work area, and beds should make those tasks practical. Even a small garden benefits from deciding where people can set down supplies and prepare for a task without blocking a path or occupying someone else’s growing space.
Map the movement of common items as well as people. A gardener carrying a bulky container may need a more direct route than someone walking through the site. If a shared work area is part of the plan, place it so users can reach it from the main route and return to the beds without crossing another plot. Leave enough room for the activity that will actually happen there, but avoid assigning a large area to a feature whose use is still uncertain.
Storage is a group decision, not only a landscaping detail. If the property has an existing place for tools, determine whether it is accessible to the people who need it and how access will be managed. If no storage is planned, consider where equipment will be carried from and where it can be set down temporarily. Do not imply that a new structure or storage feature can be added without checking the site and confirming the project scope.
Keep work areas separate from through-routes where possible. People stopped to sort tools or discuss a task can unintentionally obstruct a busy path. A small defined place to pause can help the site continue to function when several people arrive. The feature might be as simple as an open area beside the primary route, depending on the garden’s needs and layout.
Assign responsibility for keeping shared work areas orderly. Decide who returns common tools, removes plant debris, and reports a damaged surface or other concern. A physical area can encourage good habits, but it cannot replace an agreed routine. Make the expected use understandable to newcomers and revisit it if the garden’s activities change.
Plan for children, visitors, and different gardening experience
A shared garden may be used by people with different levels of familiarity. Some know exactly where to work; others may visit occasionally or join after the layout is established. A welcoming design helps each person understand where to move and what is shared. Clear routes, understandable bed boundaries, and simple orientation can reduce the need for constant verbal instruction.
Where children may be present, consider the activities they are likely to join and the areas where adults need to supervise. A group planting activity may work better in a shared zone than among individually assigned plots. Keep paths and work areas easy to read so people can focus on the activity instead of repeatedly negotiating where to stand. Site-specific safety questions should be reviewed with the responsible property owner and qualified professionals as appropriate.
Different experience levels also influence planting and maintenance plans. A complicated set of zones may make sense to experienced gardeners but be hard to explain to new participants. Use a small number of clear categories and record the essential care practices. A map can identify common planting, individual plots, and areas that need special attention, while a short orientation explains how the group uses them.
Make room for participation without assuming every visitor will perform the same tasks. Some people may help with a brief activity; others may take responsibility for regular care. The design can offer varied ways to contribute, but the group should be explicit about ongoing duties. Avoid relying on casual participation to cover essential maintenance that needs a reliable owner.
Invite a range of users to review the layout before work begins. Ask them to walk the route, identify confusing transitions, and point out where they expect to pause or work. Their feedback can expose barriers that were not obvious to the planning group. If a requested change cannot be accommodated, explain why and identify another way to support that activity.
Use planting to define space without blocking it
Plants can help distinguish a shared garden from surrounding areas, soften the edges of a path, or create a visual relationship among separate beds. Their placement should support circulation rather than obscure it. A border that grows across a route or hides a bed marker can make the site harder to navigate. Choose planting locations with mature size and ongoing care in mind.
Use planting as a cue where it adds clarity. A consistent low border may signal that a space is a shared edge, while a repeated bed shape can help users recognize the layout. The exact plant choice depends on site conditions and group preferences. Avoid assuming that a particular species will thrive without considering light, moisture, soil, and maintenance needs.
Keep important views and transitions in mind. Plants near an entrance should not make it difficult to see where the primary route leads. Planting beside a path should not create a hidden pinch point or make the route feel narrower as it matures. A tall planting can provide a sense of separation in some settings, but it may also shade nearby beds or create a maintenance task. Consider both the benefit and the tradeoff.
When selecting plants for a shared edge, decide whether the planting is ornamental, functional, edible, or simply a visual boundary. That purpose can guide selection and care. If people are expected to harvest from a shared area, explain how use is coordinated. If the planting is not intended for harvesting, make that clear so participants do not have to guess.
Review plant growth after installation and keep paths clear as the landscape develops. The first season can reveal that a plant has more spread than anticipated or that a border is harder to maintain than expected. Agree on who can prune or adjust shared planting and how changes are communicated. Small, documented adjustments can help the layout remain legible over time.
Coordinate decisions when the garden has multiple groups
Some shared gardens involve more than one organizing group, property representative, or set of users. Their needs may overlap without being identical. One group may manage planting while another looks after the surrounding grounds. Make the decision-making roles clear before the plan becomes a list of disconnected requests.
Identify who can approve changes to the site and who should be consulted. A simple responsibility map can distinguish decisions about individual beds from changes that affect shared routes, irrigation, drainage, or hardscape. If the people caring for the garden do not control the property, confirm how proposed changes will be reviewed before assuming that installation can proceed.
Use a shared plan as the reference point. Show the primary routes, beds, common spaces, and any features that require coordinated care. When someone requests a change, review its effect on other parts of the layout. Moving a bed can affect a path; changing a planting zone can affect irrigation; adding a surface can affect drainage. The whole plan helps groups understand these connections.
Agree on how updates will be recorded. A dated site map and short notes can prevent people from working from different versions. Keep the record simple enough that participants will actually maintain it. It might note which beds are shared, who is responsible for a common area, and which questions still need a site review.
When a disagreement arises, return to the priorities the group agreed on at the start. Ask which option best supports access, use, and sustainable care. If the issue depends on a technical condition, seek professional input rather than trying to settle it through preference alone. Clear process does not remove differences, but it can make decisions more consistent and transparent.
Review the garden after people begin using it
A completed layout is a starting point for observation. Once people begin moving through the garden, they may use routes differently than expected. A particular bed may attract more activity, a shared area may become crowded, or a path may need more regular attention. Schedule a review after the garden has been in use long enough for routines to become visible.
Keep the review focused on observable questions. Which routes are used most? Where do people pause? Are beds reachable without stepping on growing areas? Do shared tasks have clear owners? Are there recurring wet spots or path obstructions? Ask participants to describe what happened during ordinary use rather than discussing only what they like or dislike about the appearance.
Separate small adjustments from larger changes. Moving a marker or revising a care instruction may be straightforward. Changing bed placement, grading, drainage, or a constructed surface may require professional review and should not be treated as an informal alteration. The group should identify the kind of decision involved before work begins.
Record a few practical observations and assign follow-up actions. For example, the group might note that a path edge needs attention, that visitors need a clearer map, or that one planting zone requires a different care handoff. A short list is easier to use than a long record of every discussion. Revisit open actions at the next agreed check-in.
Seasonal conditions can reveal different needs, so a single review may not answer every question. Keep observations over time and update the plan when there is a clear reason. The purpose is not to redesign continually; it is to help the landscape continue to support the people who use it and the maintenance the group can sustain.
A practical planning sequence
The following sequence can help a property owner or organizing group move from an idea to a coordinated landscape plan. It is a planning framework, not a fixed construction specification. A professional should assess site-specific questions that require technical judgment.
- Gather the users. Identify likely participants and ask what they need to do in the garden. Record essential functions separately from preferences.
- Walk and document the property. Note entrances, existing features, sunlight, shade, slope, drainage patterns, and current movement. Use a simple sketch that reflects what is actually on site.
- Map routes and shared destinations. Draw the main path first, then routes to beds and common areas. Look for narrow points, crossings, and likely conflicts.
- Choose a bed approach. Compare in-ground beds, raised beds, containers, or a combination based on site conditions, use, and maintenance capacity. Seek assessment if soil or other conditions are uncertain.
- Define planting zones. Match planting intentions to observed light and moisture conditions. Consider mature plant size and who will care for each zone.
- Coordinate water and drainage. Plan how people reach water and how the layout responds to existing water movement. Get appropriate professional input where conditions or design decisions warrant it.
- Identify useful hardscape. Include routes and work areas that serve a clear purpose. Check how they meet beds, affect drainage, and fit the garden’s overall use.
- Write the maintenance plan. List routine tasks, owners, backups, and a way to report problems. Confirm that the design matches the group’s capacity.
- Review with the people who will use the site. Walk through the proposed layout as if carrying tools, tending a bed, or moving between shared areas. Adjust the plan where daily use reveals a problem.
- Confirm project scope. Discuss the design, installation, irrigation, planting, hardscaping, or maintenance needs with a qualified provider and confirm the work that is appropriate for the site.
This sequence helps prevent one feature from being selected in isolation. A path affects bed placement; bed placement affects access to water; planting affects maintenance; and maintenance capacity may change which features make sense. Revisiting the full plan at each stage can uncover conflicts while the choices are still flexible.
Common planning mistakes to avoid
Designing around bed count alone. More growing area is not automatically better if people cannot reach it or maintain it. Begin with routes, users, and care responsibilities, then decide how many beds fit the plan.
Leaving paths until the end. Paths are part of the garden’s infrastructure. If they are squeezed into leftover gaps, circulation may become awkward or beds may be difficult to reach. Draw the routes early and review them with actual users.
Assuming every participant wants the same arrangement. Some gardeners may prefer individual plots, while others value shared growing. Make those preferences visible and agree on the approach before laying out the site.
Ignoring shade and water patterns. A layout based only on a quick impression can place beds in conditions that do not match the intended planting. Observe the property at different times and after rainfall where possible.
Choosing plants without considering mature size. A planting that looks small at installation can later narrow paths or shade nearby beds. Plan for mature growth and select plants suited to observed site conditions.
Creating shared features without an owner. Common planting, equipment areas, and irrigation all need care and coordination. Name responsibilities before installation rather than waiting for a problem to reveal a gap.
Overcomplicating the first phase. A wide range of features can make a garden harder to establish and maintain. Focus first on the circulation, beds, water planning, and shared routines needed for the space to function.
Making assumptions about technical requirements. General guidance cannot determine the right solution for every property. Verify applicable access, drainage, construction, and other site-specific requirements with a qualified professional.
How to discuss a community garden project with a landscape provider
A productive first conversation starts with the property and the people who will use it. Bring a simple site sketch, photos if available, and a list of the group’s priorities. Note any existing conditions that need attention and explain what the garden should support. Clear context helps a provider understand the intended project rather than responding to a vague request for “more beds.”
- What activities should the garden support, and who is expected to use it?
- Which areas should be shared, and which may be individually tended?
- What are the known site conditions, including paths, slopes, shade, and water patterns?
- What kind of beds or planting areas is the group considering?
- How should people move between the entrance, beds, and common spaces?
- What maintenance can the group coordinate, and what help may be needed?
- Which decisions require further site assessment or technical confirmation?
- What work is included in the proposed scope, and what remains the property owner’s responsibility?
Ask how design decisions will account for circulation, drainage, planting zones, and ongoing care. Clarify whether the discussion covers planning only, installation, irrigation, planting, hardscaping, maintenance, or some combination. Do not assume a service category automatically includes every task a shared garden needs. Confirm details directly and document the agreed scope.
California Landscaping DP is a California-based landscaping and outdoor design company whose documented service categories include planning-related landscaping, planting, irrigation, hardscaping, and maintenance. Property owners can review the company’s service information and use the contact page to discuss a project. The property owner and provider should confirm the location, project needs, and work that can be undertaken before making assumptions about fit.
When reviewing possible concepts, ask for a clear explanation of how the design addresses shared access and care. A useful proposal should make the main routes, bed arrangement, planting approach, water considerations, and maintenance assumptions understandable. If an important issue remains uncertain, identify it as a question to resolve rather than treating it as settled.
Start a conversation about your landscape plan
Frequently asked questions
What should be planned first in a community garden?
Start with the people who will use the site and the activities they need to carry out. Then observe the property, map entrances and routes, and note sun, shade, drainage, and fixed features. Those findings guide bed placement, planting zones, and decisions about water and shared spaces. Beginning with the site and its users helps prevent a layout from being driven only by the number or shape of beds.
Should a shared garden use raised beds or in-ground beds?
There is no universal answer. The choice depends on site conditions, the intended users, the garden’s goals, and the group’s capacity to install and maintain the beds. In-ground planting may make sense where existing conditions are suitable. Raised beds can create defined growing spaces but also require a plan for construction and upkeep. Containers may fit some uses and locations. Assess uncertain soil or site conditions before choosing an approach.
How can a garden keep paths from interfering with planting?
Draw the main routes before setting bed locations. Make each bed reachable from a path and consider the mature size of plants along its edges. Define the boundary between circulation and growing areas, and review turning and passing points rather than looking only at straight sections. The appropriate path design depends on the site and its intended users, so confirm specific access needs with a qualified professional.
How should a community garden handle watering responsibilities?
Coordinate the water plan with bed locations and planting zones. Make it clear who checks shared equipment, follows the group’s watering routine, reports problems, and approves changes. Group plants with similar care needs when that suits the site, and observe whether water reaches the intended areas. The exact approach depends on the landscape and planting; discuss irrigation needs as part of the project rather than treating them as a separate afterthought.
How can a group make a garden easier to maintain?
Choose features that match the time and skills available, assign owners and backups for recurring tasks, and keep a simple map and care list. Include paths, shared planting, and irrigation in the routine rather than focusing only on individual beds. Review the plan after the garden is in use, since actual patterns of growth and participation may reveal changes that would make care more manageable.
Well-planned community garden landscaping brings movement, growing space, and shared responsibility into one understandable plan. By starting with the site and its users, coordinating paths, beds, drainage, planting, and irrigation, and agreeing on maintenance before work begins, property owners can create a garden that is easier for a group to use and care for over time.


